
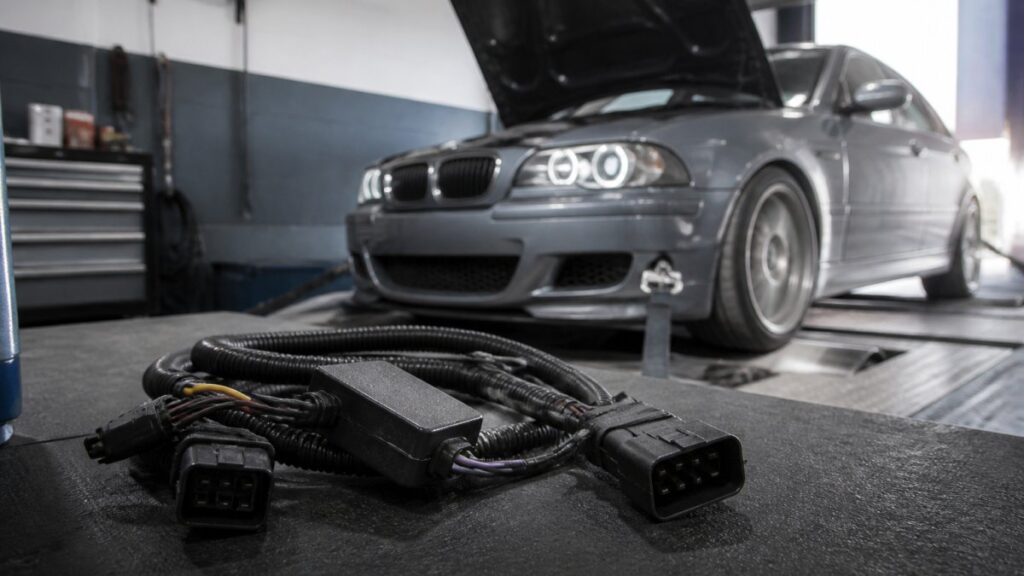
Is Mileage Control Worth It for Small Tuning Shops?
Last Updated: October 25, 2026
Quick Summary
Mileage control is worth it for small tuning shops because it prevents meaningless mileage accumulating during dyno runs, diagnostics and circuit testing while the car stays stationary. A plug-and-play blocker pauses the odometer without erasing history or altering fault codes, and with written consent and session records it keeps your shop defensible.
- A blocker pauses recorded mileage during testing but does not erase history or change ECU logs.
- Photograph the cluster and hand-write the baseline odometer reading on the job sheet.
- Get written customer consent covering registration, VIN, reason, duration and signature before fitting.
- Only a manager should approve exceptions or discrepancies, never the technician alone.
- Store modules in a lockable location signed in and out against a job number.
Table of Contents
- Why Small Tuning Shops Need Mileage Control
- Mileage Blocker for Dyno Testing: What It Does and Doesn’t Do
- Mileage Blocker vs Mileage Correction Tool: Pros and Cons
- Mileage Blocker Installation Guide for Shop Use
- Building a Lawful Workflow: Consent, Records and Staff Permissions
- Odometer Reading Record Template and Exception Handling
- Choosing the Right Mileage Control Setup for Your Shop
- Frequently Asked Questions
Why Small Tuning Shops Need Mileage Control
Mileage control is the practice of managing what a vehicle’s odometer records during off-road activity such as dyno runs, diagnostics and circuit testing.
That question matters more than most owners realise. A dyno session can put a car through repeated power pulls, yet the wheels never turn a meaningful distance. The odometer still counts.
At Mileage Blocker, we build UK-made modules for exactly this scenario. If you are weighing up whether it earns its place in a five-to-ten-session-per-month workshop, our guide to safe mileage management for dyno tuning sets out the full picture.
Mileage Blocker for Dyno Testing: What It Does and Doesn’t Do
A mileage blocker for dyno testing interrupts the signal that feeds distance data to the instrument cluster, so the odometer does not climb while the vehicle is stationary on the rollers.
What it does not do is erase history, alter stored fault codes, or change what the ECU logs about engine operation. It is a testing tool, not a reset button.
Watch out: a blocker used to conceal a car’s true mileage, rather than to prevent false accumulation during a test, moves from tool to fraud. The RAC’s explanation of mileage blockers and legality is clear that fraudulent use carries real risk. If you are comparing approaches, our breakdown of alternatives to disconnecting odometer sensors explains why pulling a sensor is the cruder, riskier option.
Mileage Blocker vs Mileage Correction Tool: Pros and Cons
These two products get confused constantly, and the confusion costs shops money. A blocker prevents mileage from being added (Mileage blockers: What do they do?). A correction tool changes a reading that already exists. They solve different problems.
Mileage blocker:
- Pros: plug-and-play fitment, no writing to the cluster, reversible in minutes, ideal for repeat dyno sessions.
- Cons: does nothing for an existing discrepancy, and requires disciplined record-keeping to stay lawful.
Mileage correction tool:
- Pros: can reconcile a cluster after a legitimate repair or replacement.
- Cons: writes to vehicle electronics, demands documented justification, and is easy to misuse.
Our position is simple. For routine testing, a blocker is the right tool. Correction equipment belongs only in documented repair scenarios with customer authorisation. The government guidance on odometer fraud and vehicle records underlines why that distinction matters.
Mileage Blocker Installation Guide for Shop Use
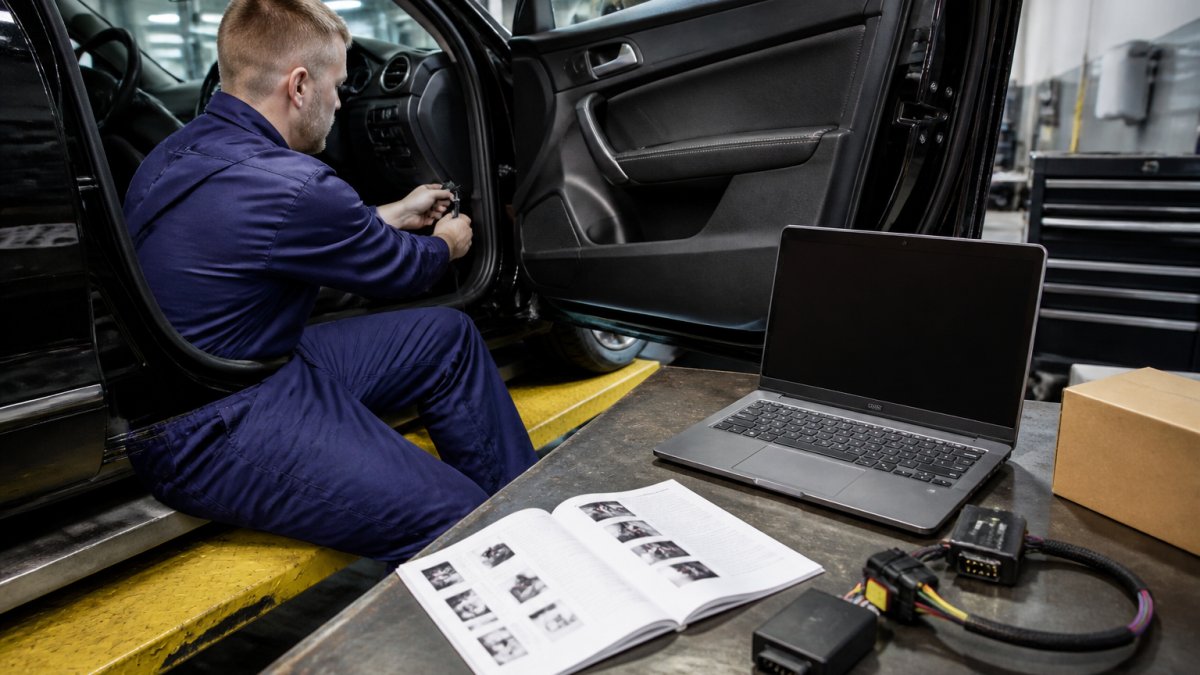
Installation is a bench-level job, not an engineering project. Our modules are plug-and-play, and every unit ships with a comprehensive fitting guide covering the connection points for your specific make and model.
Before you start
- Confirm the vehicle’s make, model, year and trim against the compatibility list. Do not assume that two cars of the same model year share a connector, facelift and engine variants often differ.
- Check the battery state. A low battery during a dyno session can trigger cluster warnings that look like a fitment fault.
- Have the job sheet, the customer authorisation and a camera or phone ready for photographic evidence.
The fitting routine
- Record the baseline. Photograph the instrument cluster with the ignition on and note the odometer reading, the trip reading and any warning lights. Write the reading on the job sheet in your own hand as well as photographing it, a photograph alone can be disputed.
- Isolate the ignition. Switch off, remove the key (or move it well away from a keyless-start vehicle) and wait for the cluster to go dark before touching any connector.
- Connect at the specified point. On most covered models this is the OBD port under the dash; on some it is an inline connector behind the cluster. Follow the model-specific guide rather than improvising. Never probe pins with a multimeter on a live circuit.
- Power up and verify. Switch on and confirm the cluster illuminates normally, the odometer holds its reading, and no new warning lights appear. If a warning light appears, stop, disconnect, and check the compatibility list again before retrying.
- Log the session. Record the technician name, the time of fitment, the customer authorisation reference and the dyno session reference on the job sheet.
- Reverse the fitment. After testing, switch off, disconnect the module, and re-record the cluster reading. Compare it with the baseline and note any variance.
Tools and equipment a small shop actually needs
- The module and its model-specific harness.
- A torque screwdriver or trim tool for any panel removal, never a flat-blade screwdriver on dashboard trim.
- A diagnostic scan tool to read and clear any stored codes created by the session, and to confirm the cluster and ECU are communicating normally afterwards.
- A job sheet or shop management system that timestamps each step.
- A designated, lockable location for the modules when not in use.
What can go wrong, and what to do
- Cluster shows dashes or a blank odometer. Usually a connector not fully seated. Switch off, reseat, and retry once. If it persists, stop and escalate.
- Warning light appears after fitment. Disconnect and re-check compatibility. Do not clear the code and hand the car back without investigating.
- Reading changes during the session. This should not happen with a correctly fitted blocker. Treat any change as an exception and follow your discrepancy procedure before the car leaves.
A blocker is a testing tool, not a repair tool. If a vehicle arrives with a mileage discrepancy, do not fit a blocker to “tidy it up”. Log the discrepancy, notify the customer, and follow your exception procedure.
For a fuller walkthrough, our fitting guides for trade users cover the practical steps in more depth. Most installs take minutes, and the module reverses just as quickly, but the record-keeping around the fitment is what makes the process defensible.
Building a Lawful Workflow: Consent, Records and Staff Permissions
Lawful mileage control rests on three pillars: written consent, a complete record, and restricted access. Get any one wrong and the whole process looks suspicious, even when nothing improper happened. The detail below is what separates a defensible workflow from a folder of good intentions.
Written consent that actually protects you
The customer should authorise, in writing, that mileage recording will be paused during testing. A verbal agreement is not enough, because the person who authorised it may not be the person who collects the car. A workable consent note contains:
- The registration and VIN.
- The reason for pausing mileage recording (for example, dyno testing or circuit testing).
- The expected duration or session count.
- A statement that the odometer will be restored to its recorded reading at handover.
- The customer’s signature and the date.
- A line confirming the customer understands that the vehicle’s recorded mileage will not increase during the session.
Keep the signed consent with the job sheet, not in a separate file that can be lost.
Record retention
Staff permissions and separation of duties
Staff permissions matter more than shops expect. Only trained staff should fit or remove a module, and only a manager should approve an exception. A simple role matrix for a small team looks like this:
| Task | Technician | Senior technician | Manager |
|---|---|---|---|
| Fit or remove module | Yes, if trained | Yes | Yes |
| Record baseline and handover readings | Yes | Yes | Yes |
| Approve an exception or discrepancy | No | No | Yes |
| Sign off the job sheet | No | Yes | Yes |
| Hold module custody | No | Yes | Yes |
Where a shop is too small to separate every duty, the rule should be that the person who fits the module is not the only person who signs off the record.
Tool custody
Modules should live in a lockable location, signed in and out against a job number. Digital odometer modules can retain traces of activity, so our guide to odometer module digital trace risks is worth reading before you set your access rules.
Approval steps for exceptions
Define in advance what counts as an exception: a reading that does not reconcile, a cluster replacement, a unit conversion, a data fault, or a customer request that falls outside normal testing.
The workflow does not need to be complex. It needs to be written down, followed every time, and stored with the vehicle record so that anyone reviewing it later can see what was authorised, by whom, and when.
Odometer Reading Record Template and Exception Handling
Every session needs a paper trail. A simple record template, completed for each vehicle, keeps your shop defensible. Copy this into your job sheets:
- Registration and VIN
- Odometer reading at intake
- Customer authorisation reference
- Module fitted by (name, time)
- Dyno session reference
- Odometer reading at handover
- Variance explained (if any)
- Manager sign-off
Exception handling is where discipline shows. If a reading does not reconcile, stop and investigate before the car leaves. Log the discrepancy, notify the customer, and record what you did about it. A shop that documents an honest mistake is in a far stronger position than one that quietly corrects it.
Choosing the Right Mileage Control Setup for Your Shop
The right setup depends on your volume, your vehicle mix and your tolerance for risk.
Vehicle compatibility is the first filter. Our trade mileage blockers cover 600+ models, with trade pricing for approved accounts and technical support included.
Choose a blocker over correction equipment for testing. Choose documented consent over verbal agreement. Choose a named technician over an open toolbox.
Frequently Asked Questions
Can a mileage blocker be used during dyno testing?
Yes. A mileage blocker interrupts the odometer signal while the vehicle runs on the dyno, so stationary test miles are not added to the recorded mileage. It does not change engine behaviour or diagnostic data used for the test. For small tuning shops, the key is to log the starting and finishing readings, get written customer authorisation, and remove the module before the vehicle leaves. This keeps mileage control transparent and defensible rather than hidden.
What is the difference between a mileage blocker and a mileage correction tool?
A mileage blocker prevents distance being added while it is fitted, typically during dyno runs, diagnostics or storage. A mileage correction tool rewrites the stored odometer value in the instrument cluster or ECU. Correction carries far higher legal and ethical risk because it alters the vehicle’s recorded history. For shop use, blocking during a defined test window plus a written record is the lower-risk option and is easier to explain to a customer or an auditor.
How should a tuning shop record mileage before and after testing?
Record the odometer reading, date, time, job number, technician name and customer signature at intake, then repeat at handover. Note any blocker fitment and removal in the same log. An odometer reading record template with these fields creates an audit trail that reconciles against the job sheet and invoice. Keep records for at least six years in line with normal business record-keeping practice, and store them where staff cannot edit them after the fact.
How can a shop avoid misleading customers about a vehicle’s mileage?
Disclose everything in writing. Explain what mileage control is used for, which tests it applies to, and confirm the odometer is restored to its true reading before collection. Never use a blocker to conceal mileage from a buyer, and never advertise a vehicle with a reading you know is inaccurate. Limiting module use to named staff, logging every fitment, and getting signed customer consent turns mileage control into a documented process rather than a hidden one.
Mileage control only works when the tool and the paperwork match. If your shop is ready to put a proper system in place, Mileage Blocker can help: UK-made plug-and-play modules, fitting guides for every unit, a 12-month warranty and round-the-clock technical support. Get started with Mileage Blocker and give every dyno session a clean, documented record.

Leave a Reply