
Fitting Guides for Car Dealerships: Installation Guide
Table of Contents
- Why Fitting Guides Matter for Dealership Operations
- Understanding Mileage Blocker Module Compatibility with Your Vehicle
- Step-by-Step Installation Process Using the Mileage Blocker Fitting Guide
- Mileage Tracking for Vehicle Testing: Recording and Documentation
- Mileage Blocker Removal After Testing: Safe Disconnection Protocol
- Training Your Technician Team on Fitting Guide Procedures
- Common Installation Mistakes to Avoid
- Frequently Asked Questions
Last Updated: October 14, 2026
Why Fitting Guides Matter for Dealership Operations
A fitting guide is a step-by-step document that helps technicians install automotive components safely and correctly, fitting guides car dealerships rely on are the foundation of reliable service delivery.
When technicians follow detailed fitting guides, installation errors drop and every technician installs components the same way, every time.
Whether your team handles five vehicles a week or fifty, a structured approach using proper fitting guides protects your reputation and bottom line.
A common mistake is skipping the fitting guide and relying on technician memory or experience. Even experienced technicians benefit from documented procedures, they work faster, make fewer errors, and can train new staff more effectively.
Understanding Mileage Blocker Module Compatibility with Your Vehicle
Not every mileage blocker module works on every vehicle. Compatibility depends on the vehicle’s year, make, model, and electronic architecture, so verify support first.
Different vehicles use different OBD-II port configurations and ECU protocols, so a module designed for a 2020 Range Rover may not work on a classic Porsche 911.
What actually determines fitment
Compatibility depends on several technical variables that must all line up:
- OBD-II pinout and port type. The 16-pin connector is standardised, but the pins used for power, ground, and CAN communication vary between manufacturers and model generations. A module that draws power from pin 16 and grounds on pin 4 will not work on a vehicle that routes those signals differently.
- CAN bus protocol. Most vehicles built after 2008 use ISO 15765-4 (CAN), but older vehicles may use ISO 9141-2, KWP2000, or J1850. The module must speak the same protocol as the vehicle’s diagnostic bus.
- ECU software version. Even within the same model year, software updates can change how the ECU reports or stores odometer data, so a module validated against one version may need revalidation after a dealer reflash.
A dealership-side fitment verification workflow
For dealerships and tuning shops, compatibility checking should be a repeatable process:
- Capture the vehicle identity precisely. Record VIN, model year, engine code, and transmission type, since mid-year changes are common.
- Cross-reference the module’s compatibility list. Match against the manufacturer’s published vehicle list, not against a generic “fits most OBD-II vehicles” claim.
- Check for software updates. If the vehicle has been serviced recently, confirm whether the ECU software version is still within the module’s validated range.
- Inspect the port and surrounding wiring. Look for existing devices, damaged pins, or aftermarket looms that could interfere.
- Run a pre-installation scan. Use a diagnostic tool to confirm the vehicle’s bus is communicating normally before the module is introduced, giving you a baseline if anything behaves unexpectedly.
- Record the outcome. Log the vehicle, module serial number, and result. This builds an internal fitment history that speeds up future jobs on the same model.
When compatibility is unclear
Some vehicles fall into grey areas: pre-2001 models with non-standard diagnostics, grey imports with different ECU calibrations, or vehicles with engine or gearbox swaps.
Every module ships with detailed compatibility information, and our fitting guides include a vehicle compatibility checklist to confirm support before installation begins.
Key compatibility factors:
- Vehicle year and production date
- Engine type (petrol, diesel, hybrid, electric)
- OBD-II port location and type
Build a one-page fitment record for each model your dealership services regularly. Note the port location, protocol, any known quirks, and the module part number that works. Over time this becomes a faster reference than re-checking the supplier list for every job.
::: Standardizing these technical notes minimizes downtime across your dealership repair services, ensuring that specialized tasks like fast auto glass repair remain as efficient as your electronic installations.
Contact our support team if you’re unsure about compatibility, our 24/7 support is available to confirm fitment before you proceed.
Step-by-Step Installation Process Using the Mileage Blocker Fitting Guide
Installing a mileage blocker module takes 20-30 minutes with the right fitting guide. Follow each step carefully. Rushing leads to connection errors and failed installations.
Preparing Your Vehicle and Workspace
Prepare properly before touching any components to prevent damage and ensure safety.
Preparation checklist:
- Park the vehicle on level ground in a well-lit workspace
- Switch off the engine and remove the key
- Wait 5 minutes for electrical systems to power down
Locating the OBD-II Port and Connecting the Module
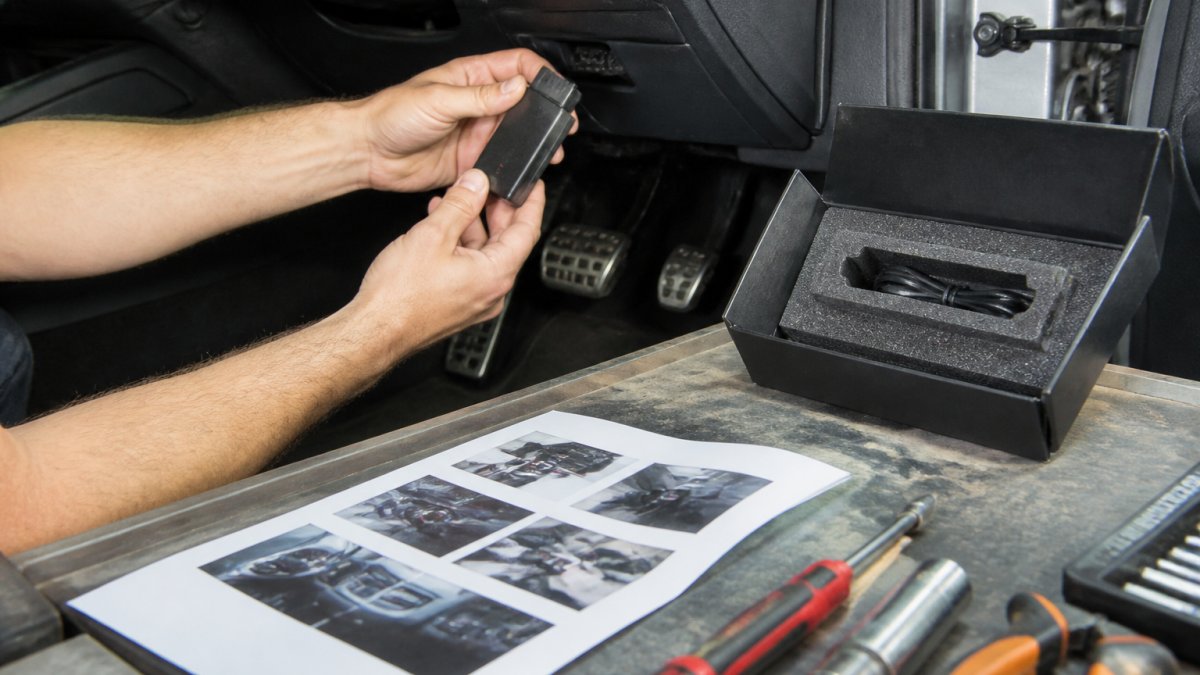
The OBD-II port is a standardised 16-pin connector found on all vehicles made after 1996. Its location varies by model but is always within reach of the driver.
Common OBD-II port locations:
- Under the steering column (most common)
- Inside the dashboard trim panel
- Behind a removable plastic cover
Consult your vehicle’s manual or fitting guide to pinpoint the location, then inspect the port for dirt or damage and clean gently if needed.
Plug the module into the OBD-II port with firm, steady pressure until you hear a soft click.
Verifying Installation and Testing Before Dyno Work
After connecting the module, verify the installation before running any tests to prevent wasted dyno time.
Verification steps:
- Check that the module LED lights up (indicates power connection)
- Confirm the module sits flush against the port with no gaps
- Verify all cable connections are secure and not pinched
If the LED doesn’t light up, disconnect the module, check the port for debris, and reconnect firmly. If it still doesn’t respond, contact support.
Run a short test drive (2-3 minutes) before full dyno work to confirm the module functions normally, and check that the odometer remains static.
Mileage Tracking for Vehicle Testing: Recording and Documentation
Accurate mileage documentation is essential for dyno testing and diagnostics. Even though the mileage blocker prevents odometer changes, you must manually record actual test miles.
Create a simple test log for each vehicle:
| Test Date | Vehicle | Start Mileage | End Mileage | Test Duration | Notes |
|---|---|---|---|---|---|
| 2026-10-14 | Range Rover 2022 | 45,230 | 45,230 | 45 mins | Dyno power test |
| 2026-10-15 | Porsche 911 1985 | 78,450 | 78,450 | 30 mins | ECU diagnostic |
This log proves vehicles were tested without accumulating road miles, documents your shop’s testing activity, and protects you legally if questions arise.
Keep these records for at least 12 months. Digital logs are acceptable, but printed copies provide additional protection.
Never delete or alter test logs. Maintaining accurate, unmodified records demonstrates professional integrity and protects your business if disputes occur.
Mileage Blocker Removal After Testing: Safe Disconnection Protocol
After testing, remove the mileage blocker module safely, since improper removal can damage the OBD-II port.
Removal steps:
- Switch off the vehicle engine
- Wait 2-3 minutes for electrical systems to power down
- Locate the release tab on the module connector
- Press the release tab gently while pulling the module straight out
After removal, the odometer resumes recording mileage normally, verify this on your next test drive.
Store the module away from moisture, extreme heat, and physical damage. It’s reusable, and modules include a protective case.
Training Your Technician Team on Fitting Guide Procedures
Consistency starts with proper training: every technician should understand fitting guides car dealerships use before handling a module. For a dealership, training is an onboarding and standardisation system that keeps quality stable as staff change.
Why dealerships need a structured approach
Most fitting-guide content online targets a single vehicle owner, but a dealership faces multiple technicians, shifts, apprentices, and service advisors who all need consistent answers. Without a structured approach, quality drifts between technicians, showing up as comebacks, rework, and inconsistent customer experiences.
A three-tier training model
Tier 1, Awareness (all customer-facing staff). Service advisors, parts staff, and sales teams should understand what a mileage blocker module is, what the fitting guide covers, and what questions to ask before booking the work, no hands-on skill required, just the ability to set accurate expectations.
Tier 3, Independent and refresher (experienced technicians). Once signed off, technicians should still complete a refresher whenever a new module model, vehicle platform, or revised fitting guide is introduced, a short walkthrough plus a practical demonstration is usually enough.
Standardising across shifts and sites
If your dealership runs multiple shifts or sites, the fitting guide is the single source of truth. To make that work:
- Keep one master copy of each fitting guide in a shared, version-controlled location.
- Print a copy for each bay, or provide tablet access at the workstation.
- Use the same sign-off checklist across all sites.
- Nominate one technician per site as the fitting-guide lead, responsible for flagging updates and answering day-to-day questions.
Measuring whether training is working
Training should be tied to observable outcomes, not just attendance. Useful measures include:
- First-time completion rate. The proportion of installations completed correctly without a return visit or rework.
- Average installation time. Tracked per technician and per vehicle model, to spot where the guide may need clarification.
- Comeback rate. Installations that generate a follow-up visit within a set period.
- Documentation compliance. Whether test logs are completed consistently.
Review these measures periodically. If one technician is consistently slower or generating more comebacks, the cause is often a gap in the guide, not a performance issue.
Onboarding new staff quickly
A new technician should reach independent installation standard within a defined onboarding window. The fitting guide shortens that window by replacing verbal handover with a documented, repeatable process, and pairing it with a practical assessment and signed checklist gives a clear path from observation to independence.
Training approach:
- Schedule a 30-minute group session with all technicians
- Walk through the fitting guide step-by-step together
- Have each technician practice on a training vehicle or test harness
- Observe their process and provide feedback
Repeat this training annually or whenever you introduce a new module model. New staff must complete training before handling any installation work.
Create a checklist technicians must sign off on before their first independent installation, this documents compliance and builds accountability.
A trained team installs modules faster, makes fewer mistakes, and handles problems more confidently. For a dealership, the bigger win is standardisation: the same guide, the same checklist, and the same sign-off process across every technician and every site, so quality does not depend on who happens to be on shift.
Common Installation Mistakes to Avoid
Most installation problems stem from rushing or skipping steps. Here’s how to prevent them.
Mistake 2: Forcing the connector. The OBD-II connector should slide in smoothly.
Mistake 3: Ignoring the LED verification. If the module LED doesn’t light up, the installation is incomplete, troubleshoot the connection before testing.
Mistake 6: Storing the module improperly. Moisture and heat damage modules.
Mistake 7: Assuming all technicians know the process. Even experienced staff need training on new equipment.
Installing a mileage blocker module correctly protects your testing operation and reputation.
Get started with Mileage Blocker today.
Frequently Asked Questions
How do I know if a mileage blocker module is compatible with my vehicle?
Check your vehicle’s make, model, and year against the mileage blocker fitting guide compatibility chart. Most modern vehicles with OBD-II ports (standard since 1996) support plug-and-play modules. If you’re unsure, contact 24/7 support with your vehicle details, they’ll confirm compatibility before you purchase. The fitting guide will specify any model-year restrictions or vehicle-specific requirements.
What should a technician check before fitting a mileage blocker?
Before installation, verify the vehicle’s battery is in good condition, the OBD-II port is accessible and undamaged, and all diagnostic fault codes are cleared. Review the fitting guide for your specific vehicle type. Ensure your workspace is clean and you have the correct tools listed in the guide. Double-check that the module matches your vehicle’s make and model. Follow the step-by-step instructions exactly to avoid triggering fault codes or damaging the vehicle’s ECU.
Can I safely remove the mileage blocker after testing without leaving a trace?
Yes. Disconnect the module from the OBD-II port, and the vehicle returns to normal operation immediately. The removal process leaves no digital trace in the ECU because the module operates independently without altering stored data. Simply unplug it, store it safely, and the odometer reads normally again. The fitting guide includes a removal checklist to confirm the module is fully disconnected and the vehicle is functioning as expected post-test.
How should dealerships track mileage during vehicle testing?
Document the vehicle’s odometer reading before installing the mileage blocker, then log it again after removal. Keep records of test duration and purpose (dyno session, diagnostics, track day) in your service records. This creates an audit trail for compliance and customer transparency. Many dealerships use a simple spreadsheet or service management software to log start mileage, test type, duration, and end mileage. This approach satisfies both internal accountability and customer confidence in your testing procedures.
Leave a Reply